Quantcast
Channel: Computer Graphics Daily News
Viewing all 1295 articles
Browse latest View live

Keyshot 8.2 released

$
0
0
KeyShot 8.2. In this release, Developer is focussing on stability and integration with 3D modeling software. There are A LOT of improvements in this release but also some important new features and updates. Also the next release Keyshot 9 is coming.

Highlighted Features and Updates include:


  -Offline Rendering Pause
  -Interior mode speed and performance increase
  -Vertical orientation for Presentation Mode
  -Shift-key drag-and-drop to add sub-materials
  -Network Rendering for Linux
  -Alembic Vertex Color/Deformable Curve support
  -Autodesk Revit 2019 Import
  -Updated SOLIDWORKS integration
  -Updated PTC Creo integration
  -Updated Fusion 360 integration
  -Updated Cinema 4D integration

Workflow Performance Improvements

You can expect your workflow in scene setup, material application and rendering to flow much better. Keyshot 8.2 was added the ability to pause offline rendering at any time and if you use interior mode, you'll notice improved speed and performance. Many updates and fixes to the KeyShot UI, making elements and actions more consistent.
More Network Rendering Options

By popular demand, KeyShot Network Rendering for Linux is here. Both Master and Slave can now be installed on Linux. Added a silent installation option for KeyShot Network Rendering on MacOS and have included many more Network Rendering improvements.
Increased Integration Capabilities

Perhaps the most input was provided from KeyShot users regarding KeyShot integration with 3D modeling software. It would be difficult to list all the updates made across the integration with various software. The top improvements include optimized and updated SOLIDWORKS integration (see more about this here), direct import of Autodesk Revit 2019 files, and support for Vertex Color and Deformable Curves included in Alembic output.

See full list of changes !
You can check out the New features of Keyshot 8


   [post_ads_2]

'State of Unreal’ for GDC 2019

$
0
0
Livestreamed opening talk with CEO Tim Sweeney and CTO Kim Libreri, plus tech briefings and two exhibition floor booths for demos and networking part of company’s extensive show plans.

Epic Games will return to the Game Developers Conference, March 18-22 at San Francisco’s Moscone Center, to reveal the latest advancements in Unreal Engine technology, and also to support the wider development community with plenty of content, hospitality, and learning opportunities.

Epic will once again have two booths, with South 349 hosting Unreal Engine tools demonstrations and learning sessions, and South 327’s “Games. Jobs. Beer.” destination serving as an oasis filled with playable games, free food and beverages, giveaways, and career networking.

Epic will also return to the Yerba Buena Center for the Arts Theater (700 Howard Street, adjacent to Moscone) on Wednesday, March 20, 9:30-10:30am PST for the annual “State of Unreal” opening session with founder and CEO Tim Sweeney, CTO Kim Libreri and special guests, followed by tech talks -- all of which will be livestreamed to Unreal Engine channels.

Updates to the following plan details will be provided on the Epic blog site as they are announced:

  -Epic Games: State of Unreal: Epic's annual opening session at the Yerba Buena Center for the Arts Theater will demonstrate the latest advancements in Unreal Engine technology, and also reveal what Epic is doing to help all developers be more successful. Hear from Epic's founder and CEO Tim Sweeney, CTO Kim Libreri, and special guests. Attend in person at the Yerba Buena Center for the Arts Theater with an Expo Pass Plus or higher, or watch the livestream at /UnrealEngine on YouTube, Twitch or Facebook.
  -Unreal Engine Tech Talks: Following the State of Unreal on Wednesday, Epic will host a full day of programming at the Yerba Buena Center for the Arts Theater from 11:00am to 6:00pm PST. Sessions will cover topics ranging from the future of physics and destruction in Unreal Engine to ray tracing and refactoring the mesh drawing pipeline in UE 4.22. Tech talks occurring during this time will also be livestreamed to Unreal Engine channels.
  -Unreal on the Expo Floor: Epic’s booth at Moscone South 327 will showcase dozens of the most exciting new titles developed with UE4. Visit for the opportunity to play a curated selection of both indie and AAA games, grab a beer, meet developers, and connect with teams looking to hire Unreal Engine talent.

   [post_ads_2]

Blackmagic Design partners with USC School of Cinematic Arts

$
0
0
Blackmagic Design has formed a strategic partnership with the USC School of Cinematic Arts (https://cinema.usc.edu), in which the company will provide hardware and software to the school over three years. The products will be used by USC students studying filmmaking and post production, while broadcast production students will now have the opportunity to work with UltraHD in the school’s television station, Trojan Vision.

Through the partnership, Blackmagic Design will provide Ursa Broadcast cameras and Ursa Mini Pro cinema cameras, ATEM 4 M/E Broadcast Studio 4K switchers, ATEM Camera Control Panels, HyperDeck Studio Pro recorders and DaVinci Resolve Micro and Mini Panels.

“Blackmagic is known for providing high quality equipment that filmmakers and other content creators find accessible,” says Elizabeth Daley, Dean of the School of Cinematic Arts. “We are thrilled our students get to use Blackmagic Design tools because we know that means they will be better prepared for the work environments they will encounter after graduation.”

The partnership with Blackmagic Design will provide a major upgrade to the equipment used by USC students, who create programming for Trojan Vision, the School of Cinematic Arts’ television station that airs in homes across Los Angeles, and online.

“While we broadcast in HD, the upgrade gives us full Ultra HD capability, which we feel creates a better learning facility for our students,” notes Greg Vannoy, who oversees Trojan Vision. The studio, which is located in the Robert Zemeckis Center for Digital Arts, will now have Ursa Broadcast cameras, ATEM 4 M/E Broadcast Studio 4K switchers, ATEM 1 M/E Advanced Panels, ATEM Camera Control Panels, and a massive array of routing components, as well as HyperDeck Studio Pro recorders, transforming the facility into a modern teaching environment.

“We are thrilled that some of the media industry’s most talented young creators will be consistently learning on and using our products and we are excited to see what they end up creating,” says Grant Petty, CEO of Blackmagic Design.

Beyond the broadcast equipment, the partnership provides DaVinci Resolve Micro Panels for students studying color grading. Students will have access to DaVinci Resolve Studio and instructors will have DaVinci Resolve Mini Panels for use in their classes. A number of Ursa Mini Pro cinema cameras will be used for student productions.

“It’s important for our students to learn in an environment that closely resembles the industry,” notes Meri Weingarten, Director of Digital Media & Technology at the school. “We know this will improve their skills.”

“We are excited to offer the Ursa Mini Pro to our students,” adds Vannoy. “Blackmagic has done a great job creating a compact, multi-purpose camera that captures a beautiful image,” said Vannoy. “We are always interested in the newest and best tools the industry is using and we’re excited to see what our students do with the URSA Mini Pro.”

   [post_ads_2]

Free Maya Arnold Shaders from VisualAct

$
0
0
If you are Maya and Arnold user this article is for you. Alot of Maya Arnold Shaders from VisualAct collections available for free.

VisualAct - a publisher of shaders, light kits, and assets, has recently made their Maya Arnold Shaders available for free. The package is a material library that provides a set of commonly used materials that can help jumpstart your look-dev process.

The material range from all kinds of metal to various plastics, rubber, and some abstract shader as well.

Download


Visit VisualAct to learn more and download some free Maya Arnold Shaders.
See also:

   [post_ads_2]

Editor's Pick: Luma Pictures's latest Visual Effects

$
0
0
Check out Luma Pictures's latest house reel including work from Hollywood blockbusters like #BlackPanther and #SpiderMan: Homecoming to creature films such as Alien: Covenant, to dramatic Oscar-nominated films like No Country for Old Men, True Grit and Doctor Strange!


LumaPictures is a visual effects studio with facilities in Santa Monica, California and Melbourne, Victoria. Founded in 2002 by Payam Shohadai and Jonathan R. Beutel, the company is well known for their creatures, environments, and effects.
[post_ads_2]

Alita: Battle Angel Concept Art by John J. Park

$
0
0

Check out some Alita: Battle Angel concept work by John J. Park - Lead Concept Artist and Co-founder of Brainstorm School. John has worked on several movies included Lone Ranger, Transformers 4, Maze Runner, Godzilla, Paranormal Activities, Spider-man 2, Hieroglyph, War of the Planet of the Apes, Dumbo, Star Wars - Rouge One, Battle Angle, Ad Astra, Deadpool, Wonder-Woman 2, Jungle Cruise, Avatar Sequels (2,3,4,5), Star Wars (unannounced)
and Games: Naughty dog (Uncharted 4) , Square - Enix, Adhesive Games(HAWKEN), Sony Games, 343 (Halo Cinematics)
John said
A huge shout out to Dylan Cole and Ben Procter for giving me the opportunity to work on this project. Also a big thanks to Steve Joyner for being a fantastic Production designer on this show.
Check out Things you should know about Alita


For more art from Alita: Battle Angel, check out Titan Books’ Art of / Making of Alita: Battle Angel.

   [post_ads_2]

SIGGRAPH Now: Making of Ralph Breaks the Internet with Walt Disney Animation Studios

$
0
0

Take a look at The SIGGRAPH Now latest video where Ernest Petti, Larry Wu, and David Komorowski from Walt Disney Animation Studios share the process for visualizing the Internet in Ralph Breaks the Internet: Wreck-It Ralph 2. Learn about the production techniques behind one of the top animated films of the previous year.


   [post_ads_2]

Chaos Group Launches One-Click Cloud Rendering Service

$
0
0
Chaos Group launches Chaos Cloud, an intuitive new cloud rendering service designed to help artists and designers visualize anything they want, from anywhere. With one click, users can now tap into the unlimited power of the cloud to render immediately, hit deadlines and finish faster than ever before.

“Artists love the idea of throwing hundreds of computers at a job but dislike the hidden costs and challenges that come with traditional cloud rendering services,” said Boris Simandoff, Chaos Cloud Director of Engineering at Chaos Group. “Chaos Cloud simplifies this process, reducing it to a single button inside the world’s most popular renderer. With so many artists and designers already using V-Ray, the benefits of the cloud can now be accessed by the widest group possible.”

Chaos Cloud is backed by five years of R&D and an extensive beta program that saw users render six million frames and over 500,000 jobs over the course of six months. Thanks to these tests, artists can now easily render an entire animation in the time it takes to render a single frame, without having to track assets, manage licenses or set up virtual machines. Chaos Cloud also removes the need to pack scenes, a laborious process that required artists to manually assemble bitmaps, scripts and plugins every time they wanted to render to the cloud. Now, this all happens automatically.

Behind the scenes, smart features are hard at work, removing all the complexity commonly associated with cloud rendering.

SmartSync
With SmartSync technology, data only needs to be uploaded once to the Chaos Cloud. After that, only the parts of a scene that change will need to be resynced, keeping upload times to the absolute minimum and ensuring quick iterations as you work.

SmartVault
All data uploaded through Chaos Cloud is stored in its secure SmartVault database for easy recall and additional renders. SmartVault keeps track of asset “fingerprints,” so they never need to be uploaded again – regardless of how they’re named, what scene they’re used in or where they’re stored locally.

Live View and Remote Control
Since the Chaos Cloud interface is entirely browser-based, artists can also control it from almost any device, including a smartphone. With Live View and Remote Control, users can monitor progress, preview images, pause or even cancel renders from anywhere with an internet connection.


While V-Ray rendering is the first offering on the Chaos Cloud, plans are already underway for Corona Renderer and Phoenix FD. In the future, Chaos Cloud will also add compatibility for distributed and GPU rendering, promising even faster speeds in the years to come.

“Chaos Cloud is undeniably the best rendering cloud out there,” said Gerardo Capote, beta tester and Lead 3D Artist at Embraer Executive Jets. “With a friendly user interface and unparalleled reliability, it provides peace of mind to any studio when you render on the cloud.”

“Chaos Cloud is perfect for time-critical projects and production deadlines,” said Ralf Pohl, beta tester and Senior Keyexpert 3D Visualization & Virtual Reality, Siemens Healthcare GmbH. “It’s very user-friendly and we look forward to integrating it in our render pipeline.”

Sign up now for 20 free credits.

Pricing and Availability
Chaos Cloud is available now and accessible via a button within V-Ray for 3ds Max, Maya, Rhino, Cinema 4D, Revit, Modo, Houdini [beta] and SketchUp (Next and 3.6 editions).

Unlike some cloud rendering services, pricing for Chaos Cloud is all-inclusive. There are no hidden fees or extra charges for licensing, uploads, downloads, storage or starting your render job immediately. Customers purchase packages of Chaos Cloud credits, which are available with volume discounts. Right now, packages begin at $100 for 100 credits and prices go as low as 55 cents per credit for larger packages. Upon sign-up, every user will get 20 free credits. Since every scene is different, Chaos Group has also compiled a gallery of samples to help see how render times and credit cost vary by scene.
   [post_ads_2]

ZBrush 2019 come with more Plugins and New Licensing Options

$
0
0
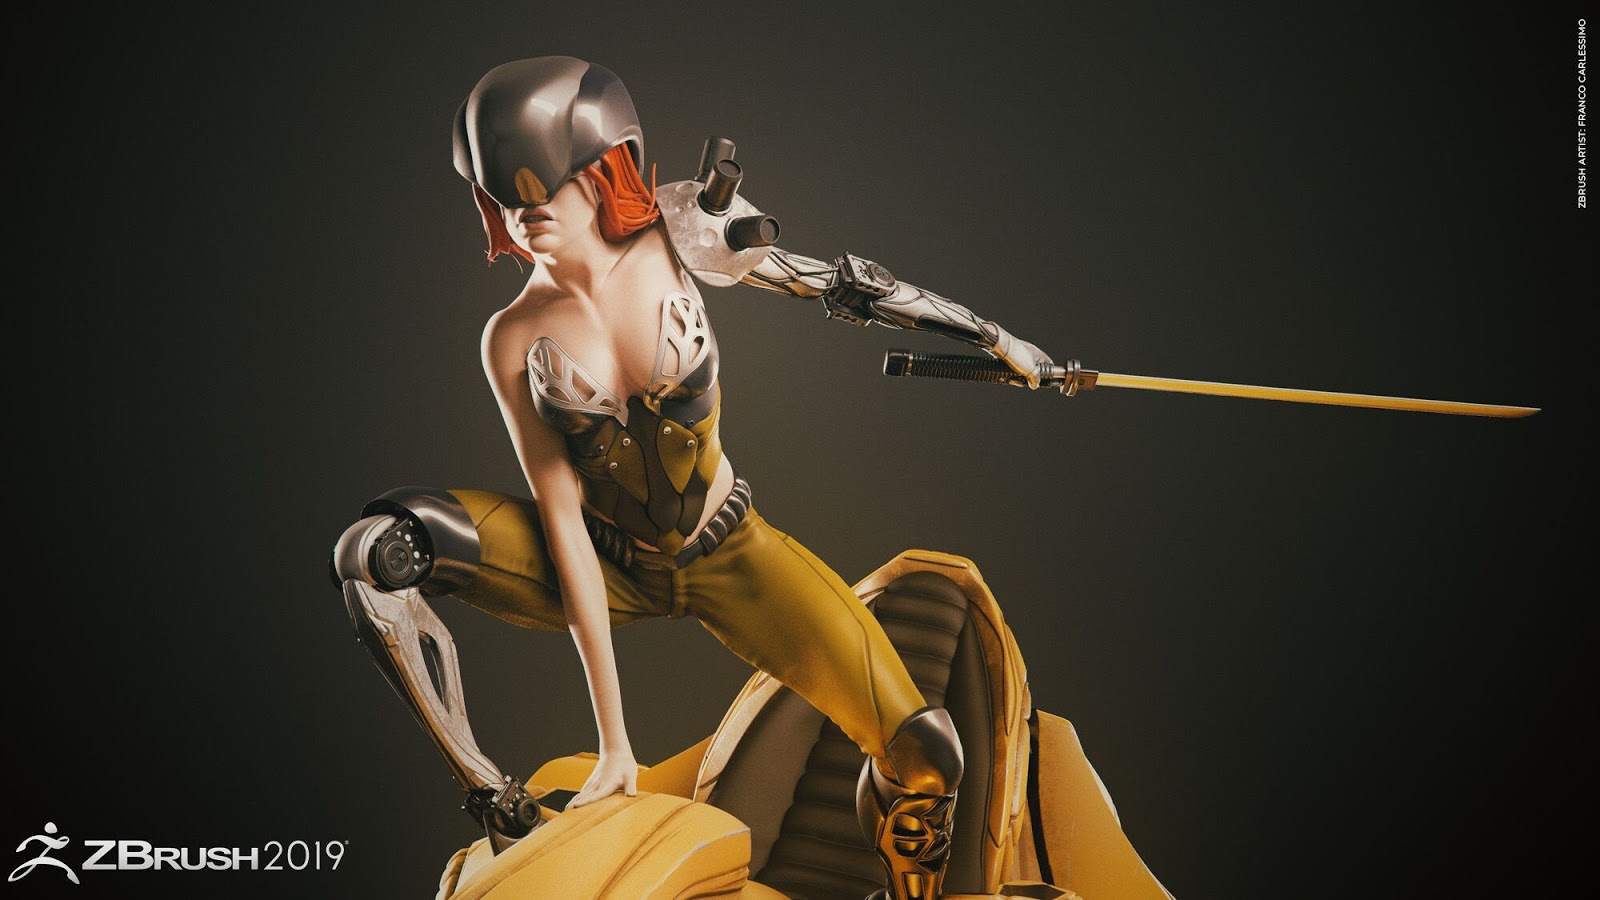
Pixologic, announced the latest release of its 2D/3D digital sculpting application: ZBrush 2019. It is used extensively in the film, game, concept, design, toy and collectibles industries, scientific illustration and much more.
With ZBrush 2019, Pixologic continues to demonstrate its commitment to meeting the demands of 3D artists. ZBrush 2019 contains new features and enhancements in rendering with the introduction of Non-Photorealistic Rendering (NPR), giving artists the ability to see their 3D artwork in a whole new way through a sketch style which replicates the hand drawn 2D feel and look. Add overlaying textures, apply halftone paper style, draw a dark outline around your 3D model or apply a number of built-in presents. The new NPR rendering system in ZBrush 2019 opens an entire world of artistic possibilities.

Also introduced in ZBrush 2019 is an entirely new way of creating 3D models: Snapshot3D. In an earlier ZBrush version we introduced the capability to project any texture’s color information onto a sculpted surface,
as well as to apply the same texture to the surface of any model as sculptural details. Snapshot3D evolves this feature in exciting ways. Simply create or import any gray scale image (alpha) to be converted into a 3D
model (mesh). The new mesh can then serve as a base for sculpting to create intricate works of art. Artists can also apply Boolean-style additive or subtractive functions to 2D images. This newly merged image can then be
converted into an original 3D model.

ZBrush 2019 offers workflow enhancements with the introduction of Folders: a file management system to help organize your 3D assets visually and logically. Far more than an organizational tool, this new feature makes it
possible to apply actions to multiple meshes at once such as Move, Scale, Rotate, Duplicate, Delete, hide/Show PolyPaint, even Live Boolean and more. Speed up your productivity with the newly released Folder system. New in

ZBrush 2019 is version 3.0 of the ZBrush automatic retopology solution, ZRemesher. In this third version, ZRemesher v3.0 now maintains creased edges and automatically detects sharp surface angles which results
in better quality automatic retopology, especially for mechanical type models. The result is also a more efficient final polygon count…with an increase of speed!

ZBrush 2019 also adds a Universal Camera system. Artists can precisely match the focal length of imported photographs and 3D renders. It is also possible to export or import the ZBrush camera settings for use in any 3D
application. The ZBrush Universal Camera offers complete control over Focal Length, Crop Factor and more. It supports undo and redo of camera movements. There is even storage of various camera settings, making it
easier than ever to find that perfect final composition.

See the features video:


2 new plugins are included with ZBrush 2019:

ZColor
With the ZColor plugin you will be able to PolyPaint your project with a set palette of colors, chosen to best express the mood you wish to create and allowing for consistent results. ZColor files can also be shared with others when you are working together.


Intersection Masker

The Intersection Masker plugin allows you to generate a mask where geometry islands intersect on a selected SubTool. Simply select a watertight SubTool that contains multiple geometry islands then click 'Create
Intersection Mask'. The SubTool will be processed and a mask will be created on the SubTool where these geometry islands intersect.

New Licensing Options

Pixologic offers new license options for ZBrush, making it more accessible than ever before to enter the powerful world of digital sculpting. Subscription licensing is an alternative to perpetual licenses, which will
continue to be available as they have always been.

Subscription licenses are available in monthly or every 6-months plan, automatically rebilling every 30 days or six months. With a subscription, you will always have the most current software version, at a price that is
perfect for hobbyists, students, and professionals who need it on a projectby-project basis Only Single-User licenses are available as subscriptions and all subscription licenses are commercial which means that there are no restrictions on how they may be used.

Perpetual licenses will continue as they have been without change. All license types (Single-User, Volume and Floating) are available for purchase as perpetual licenses and this includes academic pricing.

Pricing and Availability

Pixologic offers a variety of choices to meet your needs:
Perpetual
ZBrush retails for $895.
ZBrushCore retails for $179.95.
ZBrush 2019 Subscriptions
- $39.95 per month (on a month to month basis)
- $179.95 (every 6-months)
ZBrush perpetual or ZBrush subscriptions may be purchased online at www.pixologic.com for immediate download for both macOS and Windows platforms.

ZBrush and ZBrushCore are also available from Pixologic authorized resellers as perpetual licenses, only.
   [post_ads_2]

Houdini 17.5

$
0
0
SideFX has unveiled Houdini 17.5 - a important release for its 3D animation software application that includes a number of key features including the introduction of PDG | Procedural Dependency Graph. This new technology is available in the upcoming release of Houdini 17.5 as a new Houdini operating context called TOPs (Task Operators) and as a standalone application called PilotPDG™.

PDG is designed to:

  -Describe complex dependencies visually with nodes
  -Transform that dependency description into a set of actionable, schedulable tasks
  -Distribute those tasks with the help of a scheduler and compute them in parallel


In addition there are a wide variety of feature enhancements in Houdini 17.5 like alpha cutouts for heightfields; GPU accelerated volumes in the viewport; a principled shader with visual parity between apps, renderers and viewports; material based destruction with interactive RDB constraints; per-point friction, fibre constraints, and grooming tools in Vellum; sliced and clustered mode for distributed whitewater; distributed narrow-band sims; surface analysis in Measure SOP 2.0; and the ability to select polygons by pattern and face normal.

Check out the Houdini 17.5 Launch Presentation with SideFX's Cristin Barghiel, VP R&D, Scott Keating, Senior Product Designer, Ken Xu, Senior Software Architect - with special guest Bill Polson, Global Head of Pipeline and Workflow, MPC Film.


The planned release date for Houdini 17.5 and PilotPDG is mid March 2019.

   [post_ads_2]

Alita: Battle Angel Concept Art by Vitaly Bulgarov

$
0
0
Vitaly Bulgarov team up with Lightstorm and Weta Digital to create some concept arts for Alita’s initial “doll” body in Alita: Battle Angel movie using Zbrush, Softimage, Moi3d and keyShot

I first used Zbrush for overall form sculpting and to define part-lines placement, then Softimage for the retopo + creating more refined SubD shell surfaces and Moi3d for peripheral/visible from the outside internal components. Then took the shells back to Zbrush for additional details such as ornament and then rendered it all in Keyshot.
- Said Vitaly


Ben Procter and Dylan Cole for letting me be part of an amazing team and for the opportunity to work on this iconic manga adaptation as well as to work for Steve Joyner(Production Designer), Robert Rodriguez, Jon Landau and of course James Cameron.
He added


As a 3D character modeler for video games and game cinematics, Vitaly Bulgarov worked at Blizzard Entertainment on the cinematics team for Starcraft 2, Diablo 3, and the World of Warcraft franchise.

As a concept designer for films, he’s created robotic designs for ILM, Dreamworks, Paramount, Lightstorm Entertainment and more, on projects including Transformers: Age of Extinction, RoboCop (2014), Terminator: Genisys, Ghost in the Shell, and the upcoming Alita: Battle Angel (2018) for more information please check his website!


   [post_ads_2]

Framestore Gets Into the Action for ‘Alita: Battle Angel’

$
0
0
Based on the comic books by Japanese manga artist Yukito Kishiro, the stories of cyborg ‘Alita’ have a global cult following, which has now been brought to the big screen in 20th Century Fox’s Alita: Battle Angel. Produced by visionary filmmaker James Cameron (Avatar) and directed by Robert Rodriguez (Sin City), Framestore contributed 263 shots to the action-packed dystopian feature.

Framestore’s work on the project encompasses a broad range of VFX; from the floating city of Zalem, to the vast Iron City and the Motorball stadium; featuring keyframe animation of the team players, cheering crowds and the building of the vast stadium itself.


With Weta Digital creating the character of Alita, this was an example of a seamless and successful collaboration between VFX studios. In the shared shots, renders of Weta’s animated characters would be placed in Framestore’s worked-up environments, complete with special effects and final comp. A portion of the work was also completed in full by the Framestore team, including the creation and animation of the motorball team players, as well as stand-out environments.

Models already developed by Weta Digital for Iron City were ingested into the Framestore pipeline and laid out using the studio’s proprietary layout tools. A huge build out of the city commenced. ‘It was a lot of work and the results reflect the passion and dedication the environments team put into the process,’ says Nigel Denton-Howes, VFX Supervisor. Alita was a very large project for Framestore environment's team, who collaborated with modelling to build the city made up of nearly 300 assets. Says Jerome Martinez, Environment Supervisor, ‘we worked on the environment for about six months - from ingesting, to build, layout and lighting. At the same time we were working up concepts to show the client what direction we suggest to add polish to the final picture.’


Framestore were thrilled to get the chance to work on the Motorball sequences. Motorball is the most popular spectator sport in the Western District of the Scrapyard, the action set in a vast stadium holding a crowd of 100,000 fans. The team were supplied with a low-res model of the stadium from the pre-vis, which was then built using 321 separate assets. Artists were given details of where the track should be, before lighting the shots around the action.

For the crowd, the team worked up several archetypal characters and randomised a huge variety of clothing to provide variation in the audience. ‘These were then driven by cleaned up motion capture,’ says Denton-Howes, ‘which we captured in-house at Framestore. Each of these was then cached and then those caches were populated throughout the stadium.’ A system was developed to quickly select animation to apply to the individuals alongside, ‘we could then make them sit, stand and even do the Mexican wave,’ adds Martinez.


Framestore created eight keyframe animated ‘Pro’ Motorball players for the sequence where Alita is introduced to the sport. These ‘Pro’ players are cyborgs purpose-built for racing, and the team used reference including motorcycle races to inform the movement and action. ‘Initial concept artwork existed’, says Andy Walker, CG Supervisor, ‘but the assets team had a great opportunity to redesign several aspects and alter the mechanics so they could articulate freely enough to play the sport. After discovering one team member looked exactly like one of the concepts, we scanned several of the crew to get great reference for the CG faces.’

The action veers from the stadium and into the outside world of the Iron City, where the characters chase Alita through the streets, complete with a burst water pipe and an array of FX integration. Weta provided a fully rendered Alita for the sequence. ‘We treated the Alita material like this was our foreground plate that we could comp into’ explains Sylvain Degrotte, CG Supervisor. ‘After this the environment team went in to replace and look-dev the surroundings.’ Water simulation was created using Houdini, ‘the effects work was nuanced but challenging’ adds Denton-Howes, ‘with every shot having interactive elements both with our characters, but even more impressively with characters provided by Weta.’


Zalem is a floating city which sits above the Iron City; it’s an aspirational, futuristic city with modern curved, sleek buildings. The audience need to see the city in close-up, therefore the environments team had to develop a large portion of the city in CG, using 330 assets and over 5,000 lights, with Digital Matte Painting used for a few wide shots and clean-up. A time-lapse sequence demanded additional interest, including the use of clouds moving across the cityscape.


As Alita was filmed in native stereo, the team reviewed the stereo footage in dailies to track inconsistencies and develop creative CG solutions where simple paint fixes were not an option. ‘Shooting in stereo is still a rarity in Hollywood, so Alita was a great opportunity to dust off the tool set’, says Walker. ‘Although there were massive challenges, there was nothing better than reviewing brand new shots in full stereo glory, finding the sweet spot for dimension and impact versus scale.’

Alita: Battle Angel encompasses a range of work from Framestore who delighted in the futuristic, visionary feel of the film to work up some complex environments and characters. From floating cities to thrilling racers, the film was a novel and memorable project for the team.


   [post_ads_2]

Download Mixer 2019

$
0
0

Now you can download standalone material creation software. This release is the biggest ever update for Mixer is packed with powerful new core features. Mixer 2019 marries the power of scan-based mixing, sculpting and painting, with easy-to-use yet powerful procedural layers, all in one app. Create completely unique materials your way — photorealistic or stylized, with infinite variation.


below is the video where Josh Powers covers the basics of Mixer 2019

Download Mixer 2019 free here!
   [post_ads_2]

How V-Ray Render was used at Blur Studio to produce Netflix's ‘Love, Death & Robots’

$
0
0

There have always been blips of mature content on the animation spectrum, but never anything like Love, Death & Robots. Released last weekend, this new anthology kicks open the doors for adult-oriented content in the medium, giving a generation of fans raised on Liquid Television a way to explore the many sides of human nature in the most visceral way possible.


The brainchild of Tim Miller and David Fincher, Love, Death & Robots weaves the provocative world of ‘70s comic books into 18 short stories that run the gamut from sci-fi to horror. In this world, viewers go from “sentient dairy products” to “werewolf soldiers” pretty quick, which inspired Miller’s Blur Studio to call on friends and rivals to bring in a little stylistic diversity.


“When we put out the call to the other studios, people went wild,” said Jerome ‘Jed’ Denjean, Head of CG at Blur and VFX Supervisor for Love, Death & Robots. “We’ve been competing against some of these companies for years and admire them greatly. It was thrilling to bring everyone together and let them apply their unique visions to these shorts. It was here where all the creative freedom really paid off.”

  
Blur not only led the project, they contributed three shorts of their own. Seeing this as a chance to flex their creative muscles, Blur built on the hyper-realistic game cinematic style they are known for, and expanded into a more hand-painted, 2D-esque version of 3D. Behind every experiment was V-Ray, the Academy Award-winning renderer that’s been guiding Blur’s pipeline since 2009.


“V-Ray is so versatile and dependable that we couldn’t imagine not using it on these shorts, which is pretty amazing when you see how different they all look,” said Denjean. “We’ve always thought that animation audiences deserved more mature storylines, and now we’re finally at a place where we have the freedom and technology to give them what they want.”


Sonnie’s Edge

Blur’s first short is the first point of contact viewers have with Love, Death & Robots. A cyberpunk’s delight, Sonnie’s Edge represents a bleak, futuristic version of London teeming with violence and grime. Our heroine is a fighter in the “beastie” world, where people telepathically tap into the body of a vicious creature to do battle with another.

Director Dave Wilson wanted to create a rich, neon-colored culture that would balance the tone of the short and the rundown structures it takes place in. Here, cinematic digital humans would mix with their surroundings in a highly stylized, photorealistic way. To achieve this, the artists applied V-Ray to nearly every part of the creative process, from look dev and compositing to the final animated frames.


“V-Ray helped us add depth and atmosphere into sequences at speeds we'd only dreamt of before; not to mention, gave us full control over all the unique lighting in our scenes,” said Chris Bedrosian, CG Supervisor on Sonnie’s Edge. “During the animation phase, V-Ray's progressive renderer provided rapid feedback that our animators then used to see how the animation would work within the scene’s anticipated lighting. It was really helpful.”


Progressive rendering and careful collaboration between the lighting and animation departments proved important, as it allowed the team to visualize performances long before wholesale rendering began, with a level of fidelity that went far beyond the traditional playblast. These quick and detailed progressive renders also afforded the lighting team an opportunity to anticipate and respond to character lighting challenges well before they were under the pressure of looming deadlines, ensuring that much of the show was 'lit' and rendered before the full lighting/compositing teams went to work.

Suits
Suits, on the other hand, provided a different challenge as it was a completely new style for Blur. “Suits is filled with a lot of hand-painted textures and a language that’s closer to 2D,” said Denjean. “Tim always wanted us to try our hands on something lighter than what our clients usually ask for, so this was a great opportunity to widen our range and learn some new techniques.”


But as Blur went to work portraying the story of a community of farmers going to battle with aliens using homemade mechs, they ran into a challenge. “Chasing a non-photoreal illustrated look is harder than it seems, since you have to break the reality of lights,” said Gabe Askew, Scene Assembly Lead on Suits. “For example, we wanted rim lights to stay consistent in both placement and size without getting shadowed by another object. We relied on V-Ray’s render elements support again to do this. Things like normals passes, Cryptomattes, extra tex passes, etc. all went into building a stylized look, which gave our compositors the controls illustrators dream of.”

Shape-Shifters
Of all the creature effects Blur submitted to Love, Death & Robots, Shape-Shifters’ werewolf Marines might be the most impressive. Like most werewolf stories, Shape-Shifters incorporates a human and wolf angle, with both states being portrayed in full 3D.


“The goal was to be as photorealistic as possible. Since everything was in 3D, we also knew that photorealism had to extend across the entire frame, so we built as much detail into our environments as possible,” said Darren Butler, CG Supervisor on Shape-Shifters.

[post_ads_2]

With V-Ray Proxies, the team could throw billions of polygons into a scene to attain layer after layer of geometric detail. The Military Bunker scene alone had over 150 proxies, ranging from a chain link fence to trees and pebbles. “No details were spared and V-Ray shredded through those scenes at calculation time,” said Butler. “V-Ray Volume Grids gave us the flexibility and ease of rendering the atmospherics in the shots with accurate shadowing, lighting, and camera blur. Once we defined the look for one or two shots, we simply dropped them into the scene and hit render with great results, and little to no tweaking per shot.”


As the story builds, a werewolf dies, leading the hero to engage in a revenge quest against an enemy (werewolf) combatant. This culminates in Blur’s bloodiest Love, Death & Robots moment, as the full power of their pipeline helps the photoreal flesh and fur fly.

Future of GPU Rendering and Real-Time Ray Tracing at GTC 2019

$
0
0

GPU Technology Conference – March 19, 2019 – Chaos Group will demonstrate new performance breakthroughs in GPU rendering and real-time ray tracing this week at the GPU Technology Conference (GTC). Starting with the first public preview of its next-generation V-Ray GPU renderer, Chaos Group will show how the company has been able to take advantage of NVIDIA RTX™ ray-tracing cores to achieve its fastest rendering speeds ever. Chaos Group will also share significant advancements in Project Lavina, the company’s revolutionary real-time ray tracing technology.

Now in development, a new version of Chaos Group’s V-Ray rendering engine is being custom built to take full advantage of the dedicated ray tracing cores available in NVIDIA RTX GPUs. Working in collaboration with NVIDIA engineers, the Chaos development team has achieved their fastest GPU rendering speeds to date. On average, when compared to the current CUDA version, benchmarks of the new RTX-powered V-Ray GPU are over twice as fast and up to four times faster for select scenes.

“We’re always looking to take advantage of the latest hardware capabilities in our solutions, and the RTX cards are an exciting new development for ray tracing,” said Vlado Koylazov, Chaos Group co-founder and CTO. “And this is just the beginning. We’re excited to see how these faster rendering speeds will benefit artists and designers.”

The new RTX-enabled version of V-Ray GPU shown at GTC already includes what is needed to render most production scenes, such as motion blur, hair, particles and subsurface scattering. For release, Chaos Group plans to support all V-Ray GPU features, including volume rendering, and whenever an NVIDIA RTX card is detected, the speed increase will be automatic.

In addition to high-performance GPU production rendering, NVIDIA RTX hardware drives Chaos Group’s groundbreaking real-time ray tracer, Project Lavina. Unlike traditional real-time engines that recently layer raster graphics with ray-traced effects, Project Lavina is 100 percent ray traced. This provides the highest level of accuracy and realism, while drastically simplifying content creation workflows.

For example, to start a real-time experience with Project Lavina, a user can simply drag and drop a V-Ray Scene into the Lavina viewer. This lets any artist or designer immediately explore photorealistic scenes in real-time, without having to learn how to use a game engine. Because of the inherent advantages of ray tracing, there is no time-consuming setup of UV maps or baking lights. There is also no need to reduce geometry or limit triangles, as Lavina can easily ray trace billions of polygons at real-time speeds.

Since its debut at SIGGRAPH 2018, Lavina development has progressed rapidly. Notably, the Lavina team has implemented a new denoising algorithm for near noise-free interactivity. Current builds also include support for collision detection, procedural textures and V-Ray’s proprietary Light Cache global illumination for substantially better light quality in interior scenes.

As part of GTC 2019, Chaos Group developers will be participating in a series of talks to discuss the Future of GPU Ray Tracing, as well as Production to Real-Time Ray Tracing with V-Ray GPU and Project Lavina. Both talks will be held on March 19, in room 230B of the San Jose Convention Center, with the former beginning at 9:00 a.m. and the latter starting at 11:00 a.m.
   [post_ads_2]

Roper Technologies buys Foundry

$
0
0
London 19 March 2019: Foundry, the leading developer of software for the media, entertainment and digital design industries, today announces that it will be acquired by Roper Technologies, Inc, a diversified technology company and a constituent of the S&P 500, Fortune 1000, and the Russell 1000 indices. The transaction is expected to close in April 2019, subject to regulatory approval and customary closing conditions.

It’s a substantial move that enables Foundry to remain an independent company, with Roper assuming ownership from Hg. Roper has a successful history of acquiring well-run technology companies in niche markets that have strong, sustainable growth potential. Foundry’s track record of profitable growth and leading position within its core markets make it an excellent fit for Roper’s long-term strategy.

Craig Rodgerson, Foundry’s CEO, said: “We’re excited about the opportunities this partnership brings. Roper understands our strategy and chose to invest in us to help us realize our ambitious growth plans. This move will enable us to continue investing in what really matters to our customers: continued product improvement, R&D and technology innovation, and partnerships with global leaders in the industry.”

Neil Hunn, Roper’s CEO, said: “Foundry brings over two decades worth of experience in the digital visualization industry and a strong core management team, and this is what excited us about this partnership.”
Check out the Foundry customer reel:


Nic Humphries, Senior Partner at Hg, said: “Foundry is a business with a history of growth and innovation. Hg has built on the company’s strong development capabilities to drive enterprise adoption of the digital design offering and pioneer revolutionary new products such as Athera. We’ve enjoyed working with the team over the last four years and wish the team well as they continue their growth journey as part of Roper Technologies.”

   [post_ads_2]

Nvidia Omniverse - Open, Interactive 3D Design for Autodesk Maya, Photoshop and Unreal Engine

$
0
0


Kicking off this week’s GPU Technology Conference, underway now through Friday, March 18 in San Jose, CA, NVIDIA today introduced Omniverse, an open collaboration platform to simplify studio workflows for real-time graphics.

Omniverse includes portals — two-way tunnels — that maintain live connections between industry-standard applications such as Autodesk Maya, Adobe Photoshop and Epic Games’ Unreal Engine.

This new open collaboration platform streamlines 2D and 3D product pipelines across industries. Omniverse is built around the latest industry standards for design collaboration.

It supports Pixar’s Universal Scene Description technology for exchanging information about modeling, shading, animation, lighting, visual effects and rendering across multiple applications. It also supports NVIDIA’s Material Definition Language, which allows artists to exchange information about surface materials across multiple tools.

“With Omniverse, NVIDIA has created a product artists will be eager to put to work,” said Guido Quaroni, vice president of Software at Pixar. “When we open sourced USD, Nvidia goal was to make it easier to combine complex characters and environments into a single scene. Omniverse raises the bar, leveraging USD to enable scalable real-time collaborative workflows across some of the industry’s major software packages.”
With Omniverse, artists can see live updates made by other artists working in different applications. They can also see changes reflected in multiple tools at the same time.

As a result, artists now have the flexibility to use the best tool for the task at hand.

For example an artist using Maya with a portal to Omniverse can collaborate with another artist using UE4 and both will see live updates of each others’ changes in their application.

“We love the idea of connecting tools from all vendors to enable collaborative workflows,” said Tim Sweeney, CEO of Epic Games. “We adopted USD and MDL to streamline workflows where assets originate from many different applications, so it’s great to see NVIDIA extend that ecosystem to enable live connections with simultaneous updates.”

Artists will also be able to view updates made in real time through NVIDIA’s Omniverse Viewer, which gives users a live look at work being done in a wide variety of tools.

The Omniverse Viewer delivers the highest quality photorealistic images in real time by taking advantage of rasterization as well as support for NVIDIA RTX RT Cores, CUDA cores and Tensor Core-enabled AI.

All this allows artists to collaborate regardless of the tool they use and without the need for time-consuming conversions.

“Omniverse is an exciting concept that will enable artists around the world to collaborate on digital content creation,” said Sebastien Deguy, vice president of 3D and Immersive at Adobe. “We look forward to seeing its development and evolution.”

“We’re thrilled to explore the potential of NVIDIA Omniverse to give customers access to immersive, interactive and collaborative experiences across industries,” said Amy Bunszel, senior vice president of Design and Creation Products at Autodesk. “We share their vision of better world modeling and simulation. By combining USD and RTX, Omniverse promises to accelerate the future of design and make.”
Availability

Nvidia is now accepting applications for Omniverse lighthouse program. To be notified of updates or apply for consideration, submit your request here.

   [post_ads_2]

Sony Pictures Imageworks OpenCue Render Management tutorial

$
0
0

Ealier of 2019 Google teamed up with Sony Pictures Imageworks to develop Open-Source Render Management named: OpenCue. OpenCue incorporates a number of widely used open-source technologies, such as the Python programming language and the Postgres relational database. The main components include Cuebot, a management utility that can run in the background on a workstation or in a server cluster for higher availability; CueGUI, a graphical user interface for monitoring and managing jobs; CueSubmit, a PySide2 app for submitting render jobs that can run as a plug-in for applications including Autodesk Maya and Foundry Nuke; and RQD, a software daemon required on all OpenCue rendering hosts.

In this video, the Google Cloud Platform team highlights some key features and functionality of this tool.


   [post_ads_2]

Epic Games Announces New high-performance physics and destruction system in Unreal Engine: Chaos

$
0
0
At CGC 2019 Epic Games has announced “Chaos” - the new destruction technology has given us a glance at next-generation real-time destruction. It’s leaps and bounds above Crackdown 3’s cloud-powered (dead) multiplayer, and it’s all rendered in real-time on a PC.
With Chaos, users can achieve cinematic-quality visuals in real time in scenes with massive-scale levels of destruction, with unprecedented artist control over content creation. In addition to the initial feature set, Epic will release demo content for Chaos physics and destruction within the 4.23 window. Anf you can check out the demo below

   [post_ads_2]

Physics Animation in Uncharted 4: A Thief's End

$
0
0

2017 GDC talk by Naughty Dog’s Michal Mach on how to drive physics objects with animation more predictably, with minimal distortions and almost absolute artistic control,” states the description.


   [post_ads_2]
Viewing all 1295 articles
Browse latest View live


<script src="https://jsc.adskeeper.com/r/s/rssing.com.1596347.js" async> </script>